Spring Boot lab (part 1): Startup
The first part of this series on Spring Boot describes an approach to create a Spring Boot project.
What will be done here?
We will build a simple, and working, skeleton of a Spring Boot application.
Spring boot initializer
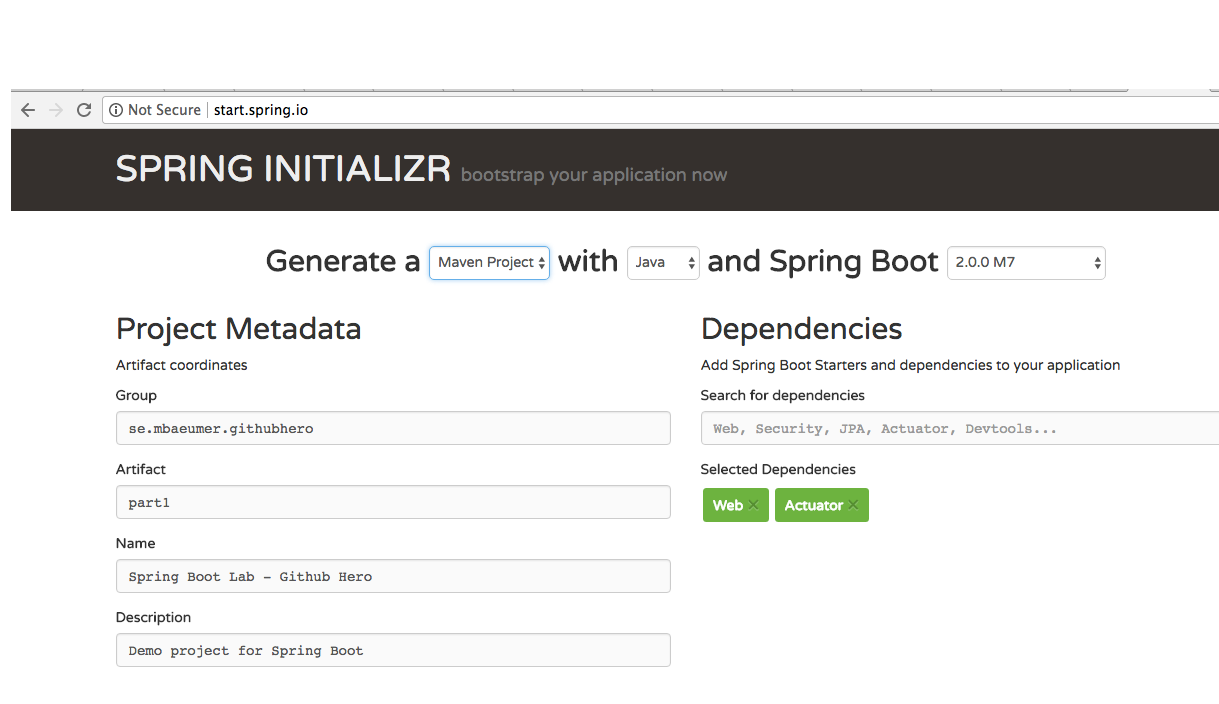
One of the easiest ways to initialize a working skeleton is through the Spring Boot initializer, that is available via http://start.spring.io.

The workflow is quite straightforward here. You need to enter the following information:
- Project metadata, such as group, artifact, package name, type of packaging Java version
- Build tool: Maven or Gradle
- The version of Spring Boot
- Dependencies to include in the pom file
When you are done, click download and you have the complete project as zip file.
Building and running
After unpacking, we are already good to go. That is, the code is ready to be built with maven and the resulting jar file is ready to be executed.
$ mvn clean install
$ java -jar target/<filename>
A look at the code
But of course, there is not much there yet so it might be more useful to take a quick look at what we got so far.
The pom.xml
In the pom.xml file there are those dependencies that we selected on start.spring.io, namely web and actuator. Besides there is a dependency to test, so that test cases can be executed right away.
<dependency>
  <groupId>org.springframework.boot</groupId>
  <artifactId>spring-boot-starter-actuator</artifactId>
</dependency>
<dependency>
  <groupId>org.springframework.boot</groupId>
  <artifactId>spring-boot-starter-web</artifactId>
</dependency>
<dependency>
  <groupId>org.springframework.boot</groupId>
  <artifactId>spring-boot-starter-test</artifactId>
  <scope>test</scope>
</dependency>
The Main class
The main class does not contain much at the moment. Note the SpringBootApplication annotation which indicates Spring Boot that this is the main class.
@SpringBootApplication
public class SpringBootLabGithubHeroApplication {
  public static void main(String[] args) {
    SpringApplication.run(SpringBootLabGithubHeroApplication.class, args);
  }
}
The resources folder
The resources folder contains folders for static content and templates. Moreover, there is a properties file
The test case
The test case does not do much right now except for testing wether the context can be loaded. This is good enough for now.
@RunWith(SpringRunner.class)
@SpringBootTest
public class SpringBootLabGithubHeroApplicationTests {
  @Test
  public void contextLoads() {}
}